That little pop-up, Android couldn’t read tag, is a common issue that can stop you from using NFC (Near Field Communication) for payments, automating tasks, or sharing your digital business card. If your Android NFC not working is a frequent problem, you’re in the right place. This error usually means your phone’s NFC reader saw a tag but couldn’t understand its data. The cause could be anything from a simple settings issue, like NFC being turned off, to physical interference or an incompatible tag type.
This guide will help you fix the NFC tag error by walking you through every potential cause and solution. We’ll cover everything from basic checks to understanding the technical reasons behind the message, ensuring you can get your NFC working smoothly on your Google Pixel, Samsung Galaxy, or any other Android device. (If you’re an iPhone user facing similar issues, see our guide on how to fix iPhone not reading NFC).
Quick Fixes for “Couldn’t Read Tag” on Android
Here are the most effective solutions to solve the problem, starting with the easiest. Work through these steps in order to quickly diagnose and fix the issue.
1. Confirm It’s an NFC Tag, Not RFID
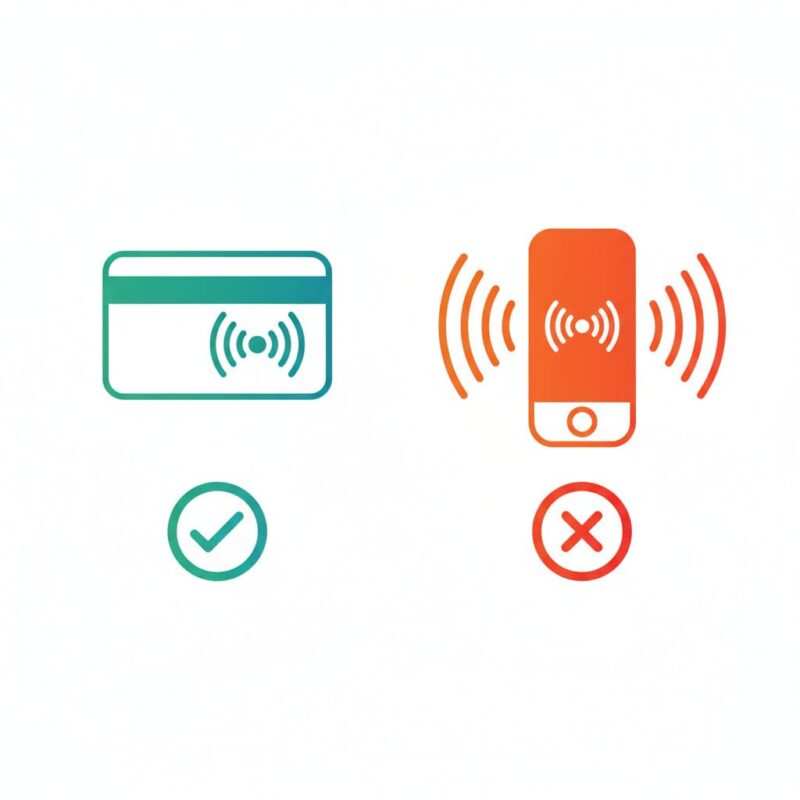
Before changing settings, verify the tag’s technology. This is the most common point of confusion. Android phones are equipped with NFC readers that operate at a specific high radio frequency (13.56 MHz), as defined by the NFC Forum. They cannot read the low-frequency (125 kHz) RFID tags often used for building access control.
- How to tell the difference: NFC tags are usually thin stickers or embedded in product packaging and posters. Access fobs for buildings are often thicker, hard plastic cards or key fobs and almost certainly use RFID, which your phone cannot read.
2. Enable NFC in Your Android Settings
It may be off on your device—verify it’s enabled. Manufacturers sometimes disable it by default to conserve a small amount of battery. Here’s how to turn it on, with paths for Android 15 NFC settings.
- On a Google Pixel & Most Other Android Devices: The path is typically Settings > Connected devices > Connection preferences > NFC. Make sure Use NFC is toggled on. This path is used by many manufacturers, including Motorola and Fairphone.
- On a Samsung Galaxy: Open Settings > Connections and toggle on NFC and contactless payments. To set your primary payment service, tap Contactless payments and choose your default app, like Google Wallet, following Samsung’s official guidance.
- Quick Settings Check: Swipe down from the top of your screen to open the Quick Settings panel and tap the NFC icon to enable it instantly. If you don’t see an NFC tile, use Settings; not all phones expose a tile.
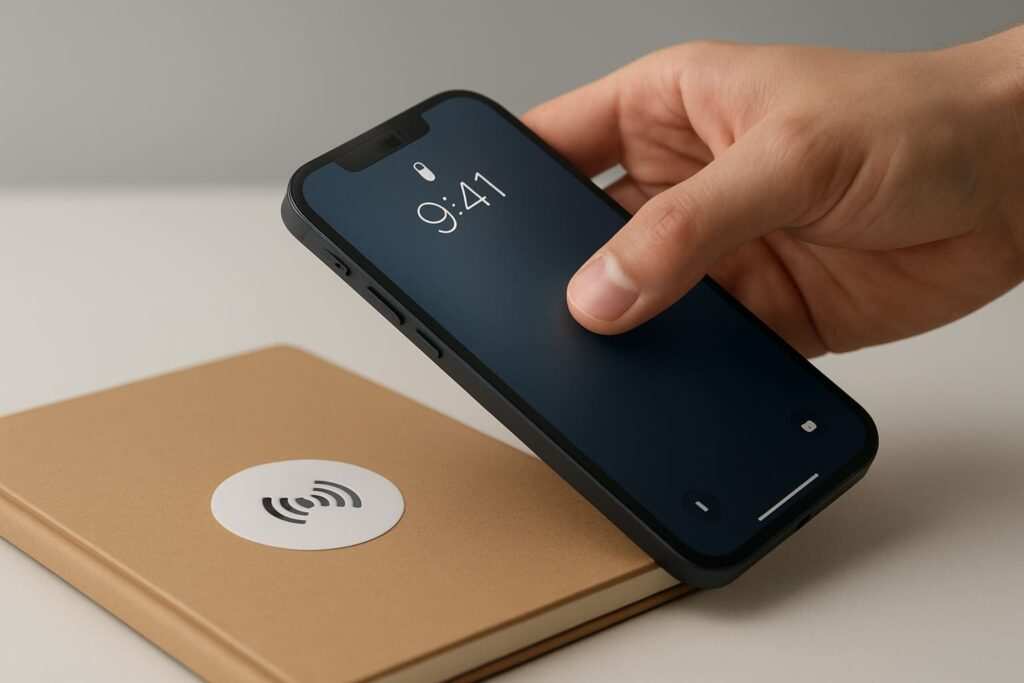
3. Find the Phone’s NFC “Sweet Spot”
NFC requires close proximity. Finding the antenna location is key, as the NFC tag reading distance is very short, typically less than 4 cm (about 1.5 inches).
- Location: Most Android devices have the NFC antenna on the back, near the camera system. Some Samsung models even show the antenna location under Settings > Connections > NFC and contactless payments.
- Technique: Avoid a quick, sharp tap. Instead, think of it as a gentle press-and-hold. Slowly bring the back of your phone to the tag and hold it steady for a few seconds. Moving too quickly can cause a
Tag losterror (TagLostExceptionfor developers), which also prevents a successful read.
4. Unlock Your Phone’s Screen
For security, most NFC actions require the phone to be unlocked. This is an intentional feature, not a bug.
- How it works: Look for a setting called Require device unlock for NFC or Secure NFC. According to Android’s documentation on Secure NFC, if this is on, you must unlock before card emulation (like payments); tag reads also typically require the screen to be on. This is a crucial security feature of Host Card Emulation (HCE) used by apps like Google Wallet.
5. Close Potentially Conflicting Apps
An app already using the NFC service can block other scans.
- Why it happens: If Google Wallet or another NFC app is open and active, it might put the phone in a payment mode (Host Card Emulation) that conflicts with the general-purpose reader mode needed to scan a simple tag.
- How to fix it: Open the app switcher on your phone and close all recent apps. Return to your home screen and try scanning the tag again.
6. Isolate the Problem with a Known-Good Tag
The issue could be an NFC tag incompatible with your device. Testing with a standard, universally compatible tag is the best way to diagnose this.
- How to Test: Use a blank NTAG213, NTAG215, or NTAG216 tag. These are fully compliant with the NFC Forum and work with all modern devices. To understand the differences between NTAG213, 215, and 216, you can choose the best one for your project based on memory needs. If an app like “NFC Tools” reads the blank tag instantly, your phone is fine, and the original tag is the problem.
7. Format the Tag to NDEF to Fix Errors

An NFC tag not formatted correctly will cause an error. Android reacts first to NDEF formatted data; unformatted or proprietary tags won’t trigger an NDEF intent until you write a standard record. Think of NDEF as a universal language that all NFC phones understand.
- Actionable Step: Use an app like “NFC Tools.” Go to the “Write” tab, choose ‘Add a record’ > ‘URL/URI’, and write a simple web address to the tag. This process is similar to how you would program an NFC business card on Android or write a vCard file to your tag. This formats it with a standard NDEF record, which Android is designed to handle automatically, as explained in the official Android developer guide.
8. Use an “On-Metal” Tag for Metal Surfaces
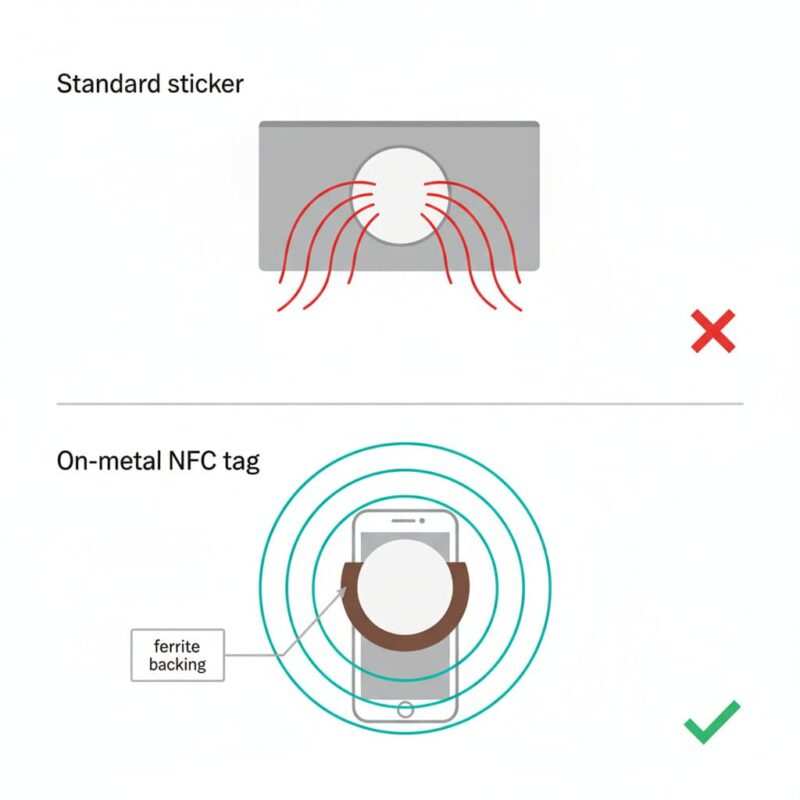
Standard NFC tags fail completely when placed directly on metal. Use ferrite-backed ‘on-metal’ NFC tags when mounting on steel/aluminum.
- The Science: Metal surfaces create something called “eddy currents” that disrupt and absorb the radio signal from the NFC reader, preventing the tag from powering on and communicating.
- The Solution: If placing a tag on a metal object, you must use a special “on-metal” tag with a ferrite backing to shield the antenna, a technology explained by NFC specialists at Seritag. This shield isolates the tag from the metal, allowing it to function normally.
9. Remove Cases, Covers, and Magnets
Thick cases or magnetic accessories are a common cause of case interference.
- How to Test: Remove your phone case, PopSocket, or any magnetic mounts and try scanning again. The NFC signal is very low-power, so even a small amount of interference from thick plastic, leather, or a magnet can be enough to block it.
10. Update Android and Reboot
A simple software glitch in the NFC service or operating system can often be the culprit.
- Actionable Steps: Go to Settings > System > System update and install any available Android updates. Then, reboot your phone. Rebooting clears the phone’s temporary memory (RAM) and forces all system services, including the NFC controller, to restart cleanly.
11. Clear the NFC System App’s Cache (Advanced)
If the NFC toggle is greyed out or unresponsive, clearing the cache of the system app that controls it can sometimes resolve the issue.
- How to do it: Go to Settings > Apps > See all apps. Tap the menu and select Show system. Find “NFC Service,” go to Storage & cache, and tap Clear cache. Reboot afterward. Avoid clearing data unless you are prepared to reset all your contactless payment setups.
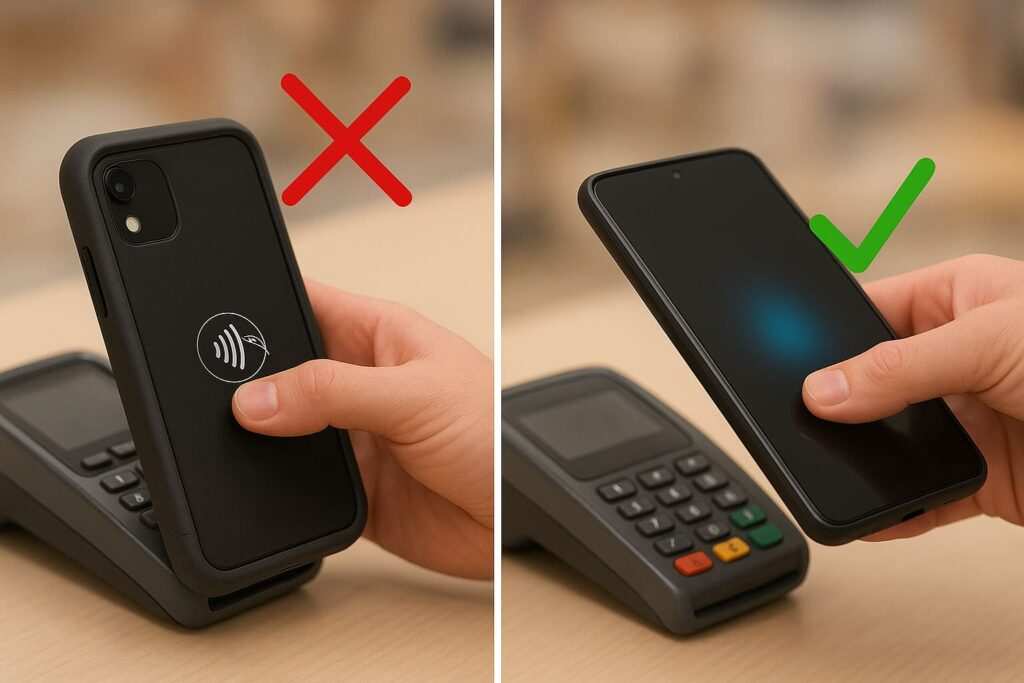
12. Use Google Wallet as a Hardware Test
Testing contactless payments is an excellent real-world test to verify your NFC hardware is functional.
- What it means: A successful payment at a store terminal confirms your phone’s NFC hardware is working perfectly. If payments work but tags don’t, the issue is almost certainly tag compatibility or formatting. If both a known-good NTAG and Google Wallet at a terminal fail, suspect a hardware issue and contact support.
13. Watch for Signs of a Hardware Fault
If NFC consistently turns itself off, or you can’t enable the toggle at all, it may be a hardware issue.
- Symptoms: A persistently greyed-out NFC toggle, the phone getting unusually warm near the camera when you try to use NFC, or the setting turning off immediately after you enable it are all signs of a hardware fault. At this point, manufacturers like Samsung recommend booking a repair.
14. Review Your “Secure NFC” Settings
This setting is designed to prevent NFC from working on a locked screen as a security measure. Setting name varies; some phones label it ‘Require device unlock for NFC’.
- Check Your Settings: If this is enabled, unlocking your phone is all you need to do to allow the scan. It adds an extra layer of security, especially for payments.
With these troubleshooting steps covered, you’ve ruled out the most common culprits. If you’re still facing issues, the problem likely lies deeper with the tag’s technology. Let’s explore those root causes.
Why Android Couldn’t Read the NFC Tag (Root Causes)
Understanding the core reason can help you prevent the error. Here’s a breakdown of what the error message really means.
What does “couldn’t read tag” mean?
At its core, the message means your phone detected an NFC chip but failed to complete a data transaction with it. This can be due to several reasons:
- Unsupported Technology: The tag might be an NFC tag not supported on Android. For instance, many phones without an NXP Semiconductors chipset cannot read older MIFARE Classic tags. Understanding NFC compatibility across iPhone and Android is crucial. Android devices are, however, required to support NFC Forum Type 1, 2, 3, and 4 tags.
- Not NDEF-Formatted or Empty: The tag is blank or contains data in a non-standard format. Android’s tag dispatch system looks for a standard NDEF message to launch an action (
ACTION_NDEF_DISCOVERED). Without it, the system doesn’t know what to do. On Android 16, scanning URLs may triggerACTION_VIEWdirectly, which can change which app opens a link. - Secure Applets/Closed Systems: You cannot read data from credit cards or secure transit passes (like those using Sony’s FeliCa technology). These systems are encrypted and use specific Application IDs (AIDs) to ensure only authorized readers can communicate with them.
- Interference or Damage: The tag is on metal, blocked by a case, or its internal antenna is physically damaged from being bent or scratched.
“New Tag Collected” vs. “Couldn’t Read Tag”
Sometimes you might see a generic “New Tag Collected” notification instead of an error. This means Android successfully read the tag’s unique ID and basic technical data (like its NfcA or IsoDep technology based on ISO/IEC 14443) but found no actionable NDEF data on it. It’s not an error, but it indicates the tag needs to be formatted with a specific record (like a URL or contact) to trigger an action.
Understanding the ‘why’ behind the error is crucial. Now, let’s quickly review how Android is supposed to handle these tags correctly.
How NFC Tag Reading Works on Android
When you tap your phone on a tag, a precise sequence happens. Think of it as a mail sorter. Per Android’s advanced NFC guide, the tag dispatch system first prefers NDEF (a letter with a clear address), then TECH (a letter with just a zip code), then TAG (an unmarked envelope).
- Discovery: The phone’s antenna emits a small radio field that powers the passive tag.
- Tech Detection: Android’s tag dispatch system identifies the tag’s underlying technology protocols (NfcA, NfcB, NfcF, NfcV).
- Action: If a standard NDEF message is found, Android fires an Intent (
ACTION_VIEW) to the correct app—opening a URL in your browser, a contact in your phone app, or connecting to a Bluetooth device.
With a clear picture of how it works, let’s revisit the definitive tests to confirm your hardware is not the problem.
How to Test NFC on Android
The most reliable way to test is twofold, covering both tag reading and payment emulation.
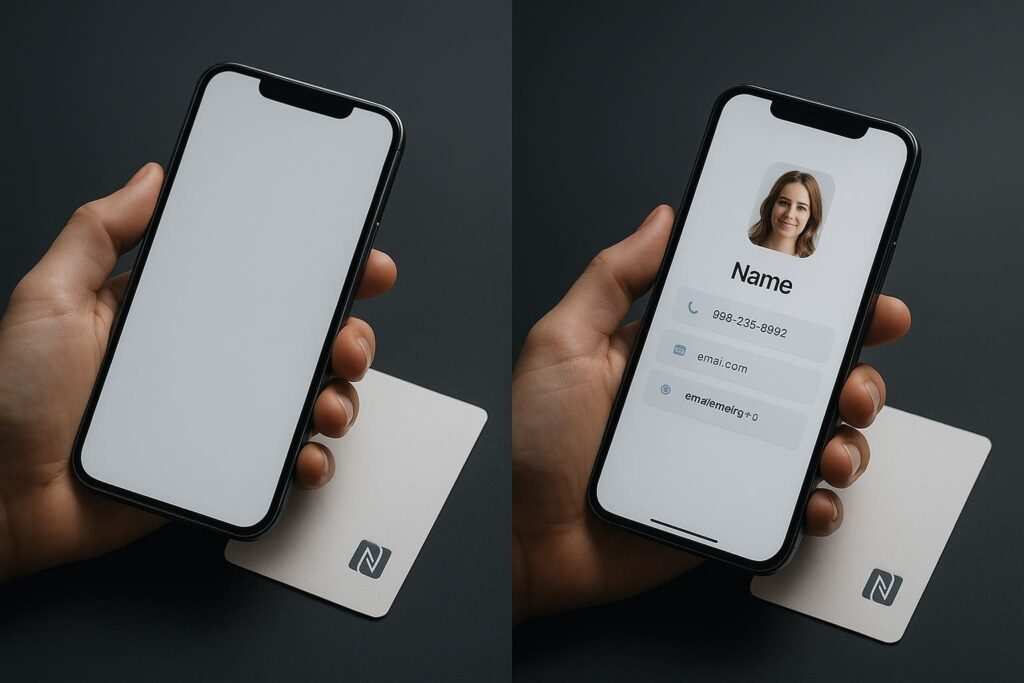
Method 1: Using a Dedicated NFC App and a Blank Tag
- Get the Gear: Purchase cheap NDEF tags on Android, such as NTAG213 stickers.
- Scan: Use a reputable app like “NFC Tools” and go to the “Read” tab. Hold the tag to your phone.
- Confirm: If the app displays detailed information like “Tag Type: NTAG 213,” “Serial Number,” and “Memory Size,” your NFC reader is working perfectly.
Method 2: Using Contactless Payments
- Setup: Open Google Wallet and ensure you have a card set up and selected for contactless payments.
- Pay: Unlock your phone and hold it near a contactless terminal at a store. A successful payment is the ultimate confirmation that your NFC hardware and software are fully functional.
To wrap up, here are answers to the most common questions people ask about this specific NFC error.
FAQs
Why is my Android saying “Couldn’t read tag”?
This usually means the NFC couldn’t read tag because it is incompatible (e.g., RFID, MIFARE Classic not supported), not formatted with NDEF data, blocked by a case or metal, or your phone’s NFC is off.
How to fix “Couldn’t read tag” on a Samsung Galaxy?
For a Samsung NFC tag error, first, ensure NFC is on in Settings > Connections. Then, check the antenna placement, remove any covers, and test with Google Wallet. If it persists, the tag is likely incompatible.
How to enable NFC on a Google Pixel?
For Pixel NFC not reading tags, go to Settings > Connected devices > Connection preferences > NFC and toggle on the Use NFC switch.
Why won’t my tag scan on metal?
Metal surfaces cause metal interference with the NFC signal. You must use a special “on-metal” tag with a ferrite layer that shields the antenna.
Is it safe to leave NFC on all the time?
Yes, it is generally considered safe. NFC has an extremely short range, requiring someone to be almost touching your phone to attempt a connection. For sensitive actions like payments, your phone must also be unlocked.
Does leaving NFC on drain the battery?
The NFC chip uses a minuscule amount of power and only becomes fully active when it detects a tag nearby. The impact on modern smartphone batteries is negligible.
Final Thoughts
Fixing the Android couldn’t read tag error is typically a straightforward process of elimination. By starting with the basics—turning NFC on, finding the sweet spot, and removing your case—you can solve most issues. If problems persist, the cause is almost always an incompatible or unformatted tag. Understanding the difference between universal NTAG tags and proprietary ones like MIFARE Classic is key to a reliable NFC experience, especially when comparing NFC vs. QR codes for business cards.
Meet Oladepo Babatunde, a technical writer and researcher who makes digital business cards easy to use in the real world. As the founder of CardAdviceHub.com, Oladepo turns tap‑to‑connect tech into clear, reliable workflows—covering NFC/QR setup, troubleshooting, platform comparisons, and practical design tips. He draws on a Higher National Diploma in Computer Science and more than a decade of writing experience since 2014 to test cards, apps, and accessories hands‑on, then share step‑by‑step guides with screenshots, checklists, and templates you can follow in minutes. When he’s not filming tutorials, he’s building resources that help solo creators and teams launch faster—no code required. CardAdviceHub focuses on informational how‑tos and does not publish financial advice.
Areas of focus: NFC tags and chips (NTAG213/215/216), iPhone/Android setup, QR best practices, platform integrations (Sheets, HubSpot, Zapier), event signage and accessories.
How I test: Real devices, repeated tap/read tests with different cases/materials, screenshots and videos for every step, and “first‑try” reliability checks.
Editorial standards: Every how‑to is reproducible, updated when apps change, and clearly labels any affiliate relationships. No financial advice.
Contact: info@cardadvicehub.com (or contact us)