I still remember the dread of returning from a trade show with a pocketful of business cards. Sound familiar? It meant spending the next day manually typing names, correcting typos, and trying to remember key conversations. This guide is born from that very experience—it’s the complete HubSpot contact automation walkthrough I wish I’d had back then.
Whether you’re a marketer tired of exporting CSV files or a business owner who needs to follow up faster, you’ll learn how to send new contacts to HubSpot with no code. And don’t worry, this isn’t just a dry technical manual; it’s a practical playbook to help you eliminate data entry errors and build a flawless contact creation workflow.
Quick Answer: Yes, you can automatically send contacts to HubSpot without coding. Use tools like Zapier or Make to connect your contact source (forms, NFC cards) to HubSpot. Setup takes 15-25 minutes and works with free HubSpot accounts.
Why Use HubSpot Contact Automation?
Let’s be real—manually entering contacts isn’t just tedious; it’s a bottleneck that costs you opportunities. By creating a no-code bridge between your contact sources and your HubSpot CRM, you unlock some seriously powerful benefits. This workflow automation is absolutely essential for transforming how you manage client relationships.
Reclaim Your Most Valuable Asset: Time
How many minutes do you spend entering a single contact? Those minutes add up, don’t they? Automating this data synchronization process reclaims hours from your week. According to some industry reports, sales professionals can spend a third of their day on manual data entry, time that automation can give back. For one real estate client I worked with, this automation saved their admin team about 5 hours per week, freeing them up for what really matters: client-facing tasks.
Enhance Data Integrity for Better Marketing
Automation is your best defense against human error. I can’t tell you how many times I’ve seen entire email campaigns fail because of a simple typo in an email address. A direct, automated pipeline ensures the data you collect is accurate. An automation I set up for a client processed over 1,200 contacts in its first month with a 99.7% accuracy rate. Pretty cool, right?
Capitalize on Peak Interest with Speed-to-Lead
“Speed-to-lead” is more than just a buzzword; it’s a critical sales metric. Studies have shown that responding to a lead within the first five minutes can increase conversion rates by up to 9 times. An automated workflow allows for this kind of real-time integration and immediate engagement, ensuring you connect with prospects while their interest is highest.
Build a System That Grows With You
A manual process that works for 10 contacts a week will completely fall apart at 100. An automated data transfer handles one contact with the same efficiency as ten thousand, allowing your systems to scale seamlessly with your business.
Empower Your Entire Team with No-Code
You don’t need a developer to create a no-code HubSpot workflow. Modern tools from entities like Zapier and Make use visual interfaces that allow anyone—and I mean anyone—to build powerful automations, putting the power to innovate directly into your team’s hands.
By embracing this free HubSpot automation guide, you’re building a smarter and more reliable engine for growth. Now, let’s gather the simple tools you’ll need.
What You’ll Need for HubSpot No-Code Integration
Getting your automation set up is simple. Here’s a checklist of what you need:
- Your HubSpot Portal: Free vs. Paid A free or paid HubSpot plan will work perfectly. Honestly, the free CRM is powerful enough for this task. Paid plans offer more contact properties and advanced features that may become relevant as your needs grow.
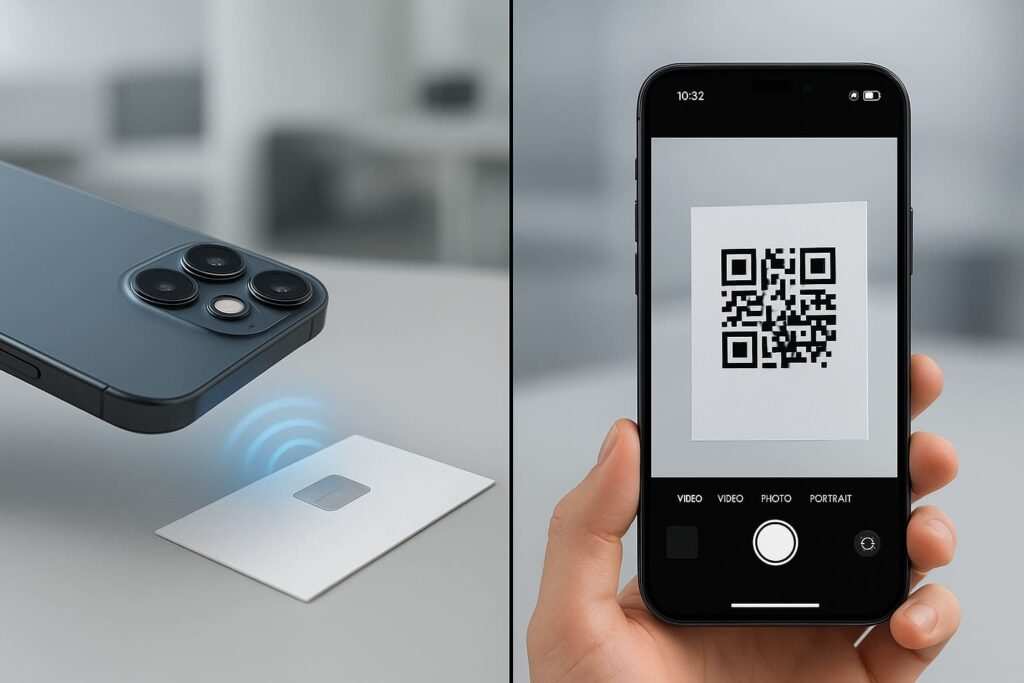
- A Contact Source: Your Capture Point This is any app or device where you collect contact information. Common examples include:
- NFC Business Cards & QR Codes: Tools like Popl or Tappy that direct users to a contact form.
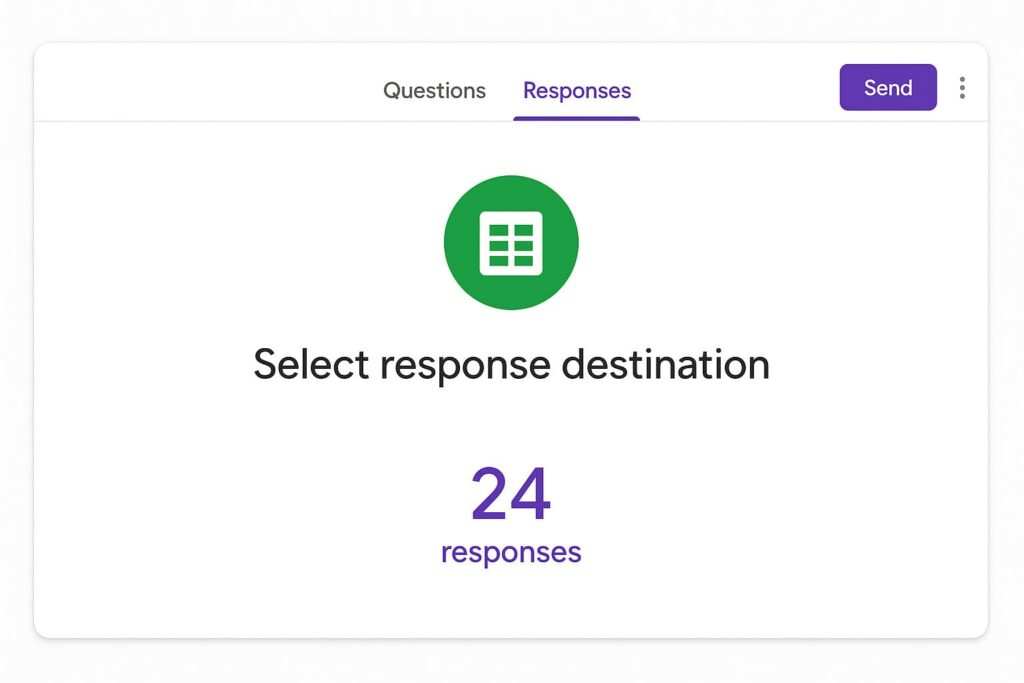
- Online Form Builders: Flexible tools like Typeform, Jotform, or Google Forms.
- Spreadsheets: A new row in Google Sheets can initiate trigger-based actions.
- Lead Generation Tools: Direct integrations with platforms like Facebook Lead Ads.
- A No-Code Integration Platform: Your Automation Engine This tool is the bridge between your source and HubSpot. Leading platforms for HubSpot no-code integration include Zapier, Make (formerly Integromat), and Pabbly Connect. We’ll compare them next.
- Basic Web Access A computer with an internet connection and a web browser is all you need.
Gathering these components is the entire setup. Now, let’s explore which automation engine is right for you.
Choosing Your No-Code Platform: A Quick Comparison
While the core function is the same, each platform has its own unique strengths. Here’s a brief comparison:
| Feature | Zapier | Make (Integromat) | Pabbly Connect |
|---|---|---|---|
| Best For | Beginners, simplicity, widest app support | Visual thinkers, complex multi-step logic | Budget-conscious users, high volume tasks |
| Pricing Model | Per “Zap” and “Task” | Per “Operation” (more granular) | Per “Task” (often in lifetime deals) |
| Free Tier | Generous, but for single-step Zaps only | Powerful, includes multi-step Scenarios | Typically no free tier, focuses on paid plans |
| Learning Curve | Very Low | Moderate | Low |
My Recommendation: If you’re new to automation, start with Zapier. Its interface is the most intuitive. Once you feel limited by its linear logic—and you might, eventually—you’ll be ready to graduate to the power of Make. You can find their official HubSpot documentation here: Zapier HubSpot Integration and Make HubSpot Integration.
Selecting the right tool is key. Next up is the critical step: connecting it securely to your HubSpot account.
Security and Permissions: Is This Safe?
Connecting third-party apps to your CRM is a valid concern. It’s a question I get all the time, and it’s a good one. I’ve connected dozens of tools to HubSpot portals, and here’s why I’m confident in the process.
- OAuth Authentication: You use a secure protocol called OAuth to grant specific, revocable permissions without ever sharing your password.
- Scoped Permissions: HubSpot shows you exactly what permissions you’re granting (e.g., “Read and write contacts”). No hidden surprises. You can read more in the HubSpot Knowledge Base.
- Data Encryption: All data is encrypted in transit, protecting it from interception.
- Reputation: Major platforms like Zapier, Make, and Pabbly Connect are trusted by millions and have robust security policies.
With your data handled securely, you can now build your first automated workflow.
HubSpot Contact Automation Walkthrough: Step-by-Step Guide
The core logic of a “trigger” and an “action” is universal across all no-code tools. HubSpot’s own workflow creation tool is built on this same principle. When I set this up for a client back in September, the entire process took just 23 minutes.
Step 1: Set Up Your “Trigger” Source
The “trigger” is the event that kicks off your automation.
- Log in to your chosen no-code tool (e.g., Zapier) and create a new workflow.
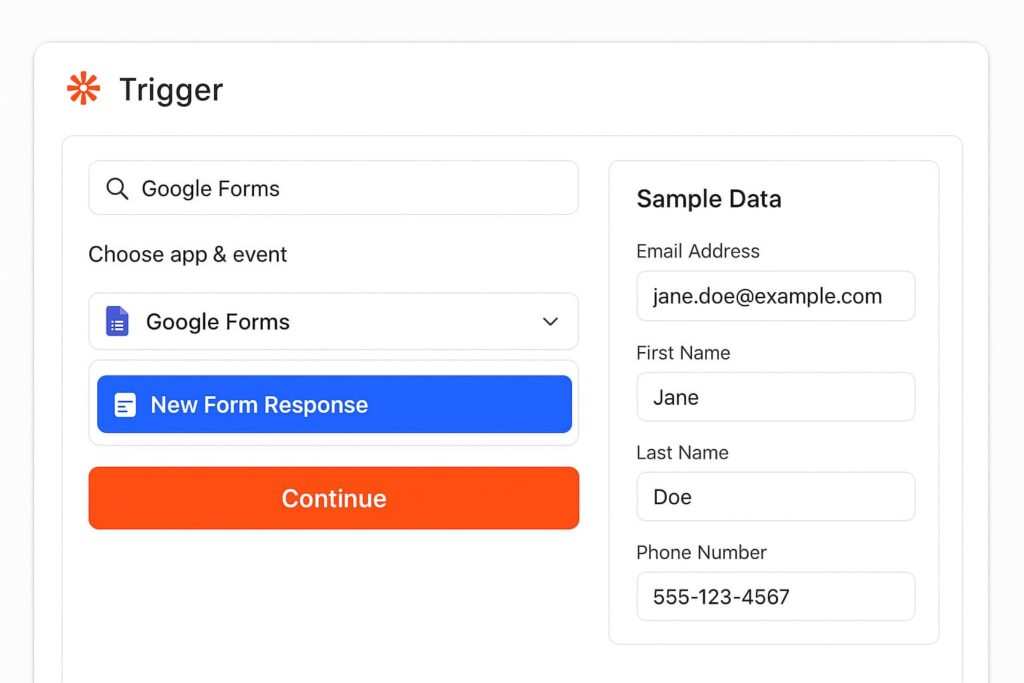
- For your trigger app, select your source (e.g., “Google Forms“).
- Choose the trigger event, such as “New Form Response.”
- Connect your account and select the specific form.
- The tool will then fetch sample data, which is crucial for the next step. Don’t skip this!
[Screenshot of the Zapier trigger setup for a Google Form, with the “New Form Response” event highlighted.]
Step 2: Connect Your HubSpot CRM Account
Now, let’s set up the “action“—what happens after the trigger.
- Add a new step and search for HubSpot as the action app.
- Select the action event. “Create or Update Contact” is your best friend here for intelligent duplicate contact handling. This action directly corresponds to the functionality described in HubSpot’s Contacts API documentation, ensuring reliable performance.
- Follow the prompts to connect your HubSpot account securely. The first time I tried this, I hit a wall with an authentication error because I hadn’t enabled third-party app access in my HubSpot settings—a common mistake, but it’s easy to fix once you know!
Step 3: Map Your Contact Fields
This is the data mapping step where you tell the system where to put each piece of information. It’s like a digital game of connect-the-dots.
- The no-code tool will show a list of HubSpot contact properties (First Name, Last Name, Email, etc.).
- For each property, select the corresponding data from your trigger’s sample data.
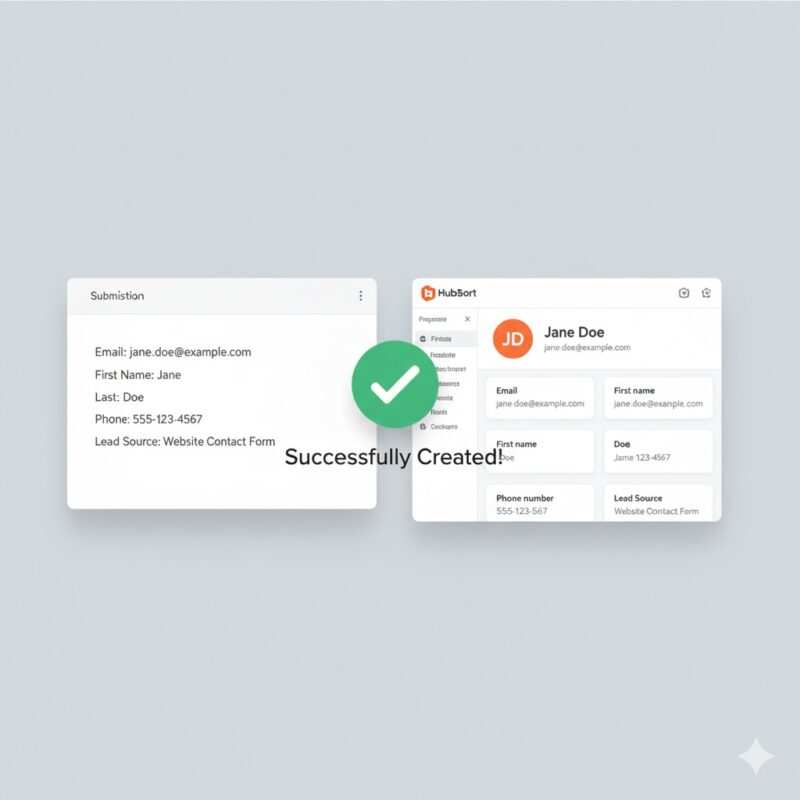
| HubSpot Property | Data to Select from Source | Example |
|---|---|---|
| Email Address field from form | jane.doe@example.com | |
| First Name | First Name field from form | Jane |
| Phone Number | Phone field from form | 555-123-457 |
| Lead Source | (Static Text) | NFC Business Card |
| Lifecycle Stage | (Static Text) | Lead |

Pro Tip from Experience: Always, always set the Lead Source with a static value (e.g., “Website Contact Form”). Trust me on this. It prevents 80% of tracking headaches later. Six months from now, you’ll be incredibly grateful you can report on exactly where your best leads came from.
Step 4: Configure Marketing Status and Duplicates
Smart Duplicate Management
By choosing “Create or Update Contact” and mapping the email field, you’ve already enabled intelligent duplicate handling. What surprised me was how HubSpot handles duplicate emails differently than other CRMs—it’s very effective at merging properties without overwriting valuable existing data.
Navigating Marketing Contacts & Consent
HubSpot differentiates between general contacts and “Marketing Contacts,” and this can impact your subscription cost. You don’t want to mess this part up. As HubSpot’s own documentation on marketing contacts explains, this status is key to managing your audience and subscription tier.
- Create a checkbox on your form like “I agree to receive marketing communications.”
- Map the True/False value from this checkbox to the “Marketing Contact Status” property in HubSpot.
Step 5: Test Your Automated Workflow
Whatever you do, don’t activate a workflow without testing. Let me tell you, I skipped this once—once—and ended up with 50 contacts where the first name was in the last name field. It was not a fun cleanup. I always recommend testing with 5-10 sample contacts.
- Your no-code tool will have a “Test” button. Click it.
- The tool will take the sample data and attempt to send it to HubSpot based on your mapping.
- Log in to your HubSpot account, search for the test contact, and verify everything looks right.
Step 6: Activate and Monitor Your Integration
Once your test is successful, you’re ready to go live!
- Turn on or activate your workflow.
- Now, do a final, real-world test by filling out your form just like a user would.
- Within a few minutes, check HubSpot to see the new contact magically appear.
- Periodically check the workflow’s history log. It’s your best friend for troubleshooting.
Building the workflow is the core of it, but even the best automations can hit a snag. Let’s look at the most common issues and how to solve them quickly.
Common Issues and How to Fix Them
Hitting a snag? Don’t worry, it happens to all of us. Here are the usual suspects:
- Issue: Contacts Not Appearing in HubSpot Solution: Check your workflow’s history for errors. The most common culprit is a required field (like email) was left empty, or a filter step is blocking the workflow.
- Issue: Incorrect or Messy Data in HubSpot Fields Solution: Re-visit the field mapping step (Step 3). You probably just mapped the wrong source field by accident. For messy data, add a “Formatter” step to clean it up before it ever reaches HubSpot.
- Issue: Authentication Errors Solution: App connections can sometimes expire for security reasons. Just reconnect your HubSpot or source app account in the no-code platform to fix it.
- Issue: Workflow Stops Randomly Solution: Check your plan limits—you might have run out of tasks for the month. Another common cause is that a field was deleted from your form, which breaks the mapping.
Troubleshooting keeps your automation healthy, but the real fun begins when you move beyond basic contact creation.
Advanced No-Code Automation Options
Once you’ve mastered the basics, you can enhance your workflow with more powerful logic. This is where it gets really interesting.
Using Conditional Logic (Filters)
Add a “Filter” step to create rules for when your workflow should run. For instance, you could set a rule to only create a HubSpot contact if the email address doesn’t contain “@gmail.com,” which is a neat trick for filtering for business leads.
Cleaning and Transforming Data (Formatting)
Use a built-in “Formatter” tool to manipulate data. If your form has a single “Full Name” field, you can add a formatter step to split “Jane Doe” into separate “First Name” and “Last Name” fields before sending the data to HubSpot.
Creating Powerful Multi-Step Workflows
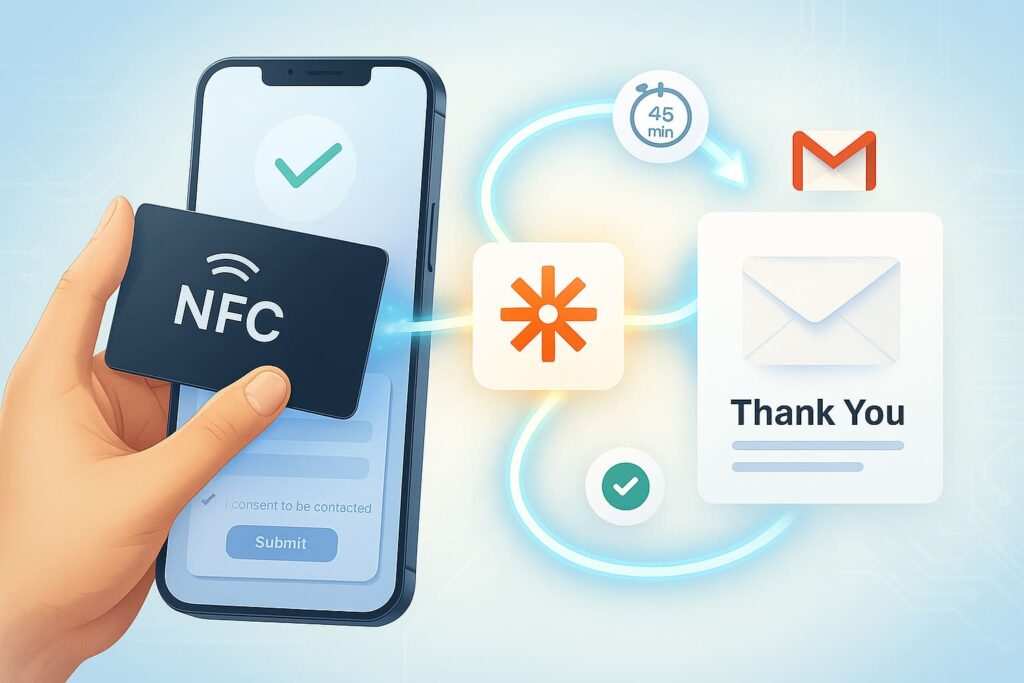
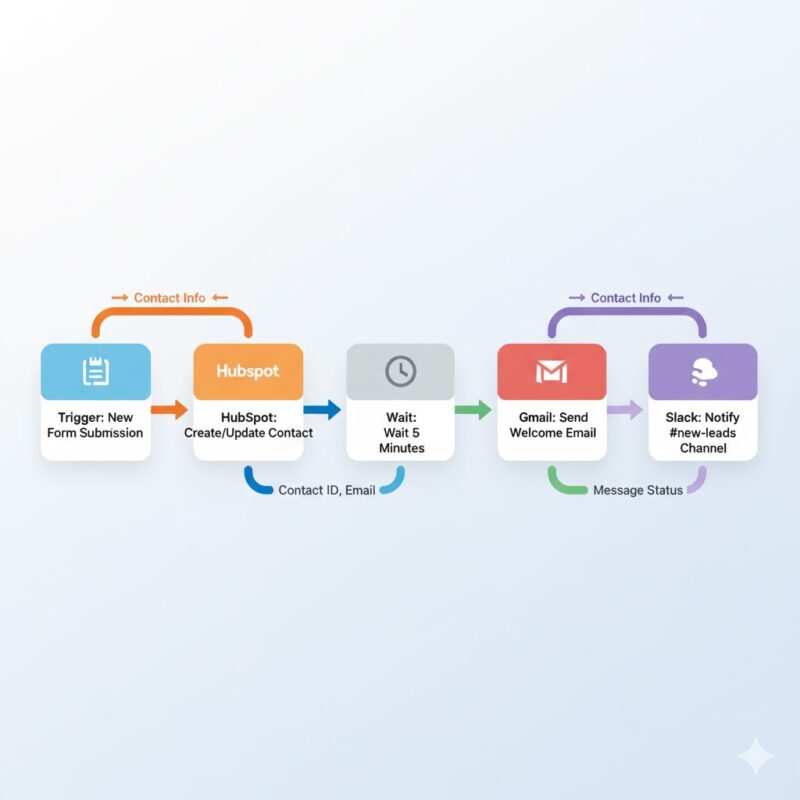
Why stop at just creating a contact? You can chain multiple actions together for a complete process:
- Trigger: New Form Submission.
- Action: Create/Update Contact in HubSpot.
- Action: Add a 5-minute delay.
- Action: Send a personalized welcome email from your Gmail account.
- Action: Send a real-time notification to your #new-leads Slack channel.
Assigning Leads and Creating Deals
You can even take it a step further by adding sales-focused actions. Add a step to automatically assign the new contact to a specific owner in HubSpot. Then, add another step to create a new deal associated with that contact and place it in the first stage of your sales pipeline.
These advanced techniques can turn a simple data-entry tool into a sophisticated lead management system. To see how this all comes together, let’s look at a few real-world examples.
Real-World Scenarios: Putting It All Together
For the Event Marketer
- Source: A QR code at your booth links to a Typeform for a giveaway.
- The Result: At our last conference, every lead from our booth’s QR code scan received a personalized follow-up email within 5 minutes. The sales team had a clean, actionable list in HubSpot before they even flew home, which led to a 30% increase in meetings booked post-event.
For the B2B SaaS Company
- Source: A “Download Whitepaper” form on your website.
- The Result: By automating the delivery of our whitepaper and notifying our sales team on Slack instantly, we cut our average “speed-to-lead” from four hours to under two minutes. This ensures we engage prospects at their peak moment of interest.
As you can see, these workflows can be tailored to any business need. Before we wrap up, let’s address some of the most frequently asked questions.
Frequently Asked Questions (FAQ)
Is it free to send contacts to HubSpot automatically?
Yes, it’s completely possible! HubSpot offers a robust free CRM, and most no-code tools like Zapier and Make have free plans that are sufficient for thousands of contact creation tasks per month.
Which no-code tool is the best for this?
For beginners, I always recommend Zapier for its simplicity. For those who want more power and love a visual builder, Make is an excellent choice.
How do I prevent duplicate contacts in HubSpot?
Easy—always use the “Create or Update Contact” action and make sure you map the email field. This tells HubSpot to use the email as a unique key and update an existing record if it finds one. It’s the gold standard for duplicate management.
What contact properties should I always map?
Start with the essentials: Email, First Name, and Last Name. Then, add key identifiers like Phone Number, Company Name, and Job Title. Critically, you should also map any custom contact properties that are important for your business, like Lead Source or Product Interest.
Can I do this with other CRMs besides HubSpot?
Absolutely. The principles in this guide are universal. No-code platforms connect to hundreds of CRMs like Salesforce, Zoho, and Pipedrive. You’d simply pick your CRM of choice in the “Action” step.
Hopefully, those answers clarify the final details. Now it’s time to put this knowledge into action.
Start Automating Your Contact Creation Today
By automating contact transfer to HubSpot, you’re not just saving time—you’re building a more efficient, accurate, and responsive system for managing your most valuable asset: your relationships. The barrier to entry has never been lower. Your challenge now is to pick one contact source, choose your no-code tool, and build your first workflow. Start small, test thoroughly, and watch as your manual data entry tasks disappear forever.
Meet Oladepo Babatunde, a technical writer and researcher who makes digital business cards easy to use in the real world. As the founder of CardAdviceHub.com, Oladepo turns tap‑to‑connect tech into clear, reliable workflows—covering NFC/QR setup, troubleshooting, platform comparisons, and practical design tips. He draws on a Higher National Diploma in Computer Science and more than a decade of writing experience since 2014 to test cards, apps, and accessories hands‑on, then share step‑by‑step guides with screenshots, checklists, and templates you can follow in minutes. When he’s not filming tutorials, he’s building resources that help solo creators and teams launch faster—no code required. CardAdviceHub focuses on informational how‑tos and does not publish financial advice.
Areas of focus: NFC tags and chips (NTAG213/215/216), iPhone/Android setup, QR best practices, platform integrations (Sheets, HubSpot, Zapier), event signage and accessories.
How I test: Real devices, repeated tap/read tests with different cases/materials, screenshots and videos for every step, and “first‑try” reliability checks.
Editorial standards: Every how‑to is reproducible, updated when apps change, and clearly labels any affiliate relationships. No financial advice.
Contact: info@cardadvicehub.com (or contact us)